Saturday, May 21, 2011

Grow Your Own Pomegranates


Photo courtesy of Tatjana
Pomegranates can be grown outdoors in USDA hardiness zones 7-10. Many people find they make nice shrub fences and barriers as their height can be controlled and their foliage is fairly dense. Once your plant has grown into a gallon container indoors it should be ready for the outdoors.

It's probably cheaper for you to buy a pomegranate locally and obtain seeds from there. You can buy them online but I recommend actually buying an entire fruit. This way you get to enjoy some of the delicious ruby gems inside! There's plenty of seeds in there so you won't have to be shy. For those of you who aren't familiar with how to select or open a pomegranate fruit (technically a berry!) see this helpful how to: How to Select & Prepare Pomegranate

 Now onto the growing!

To start you'll need to clean the aril (fleshy part) off from around the seed. This can be done by sucking it off or using your nails to clean it. If you choose to suck it off be careful not to bite down on the seed. When you're done you will need to let the seeds dry overnight as they are susceptible to mold. Lay the freshly cleaned seeds out on a paper towel and set it in the window. Come morning they should be ready provided you spaced them fairly on the towel. I set mine near the heating pad and they dried nicely. The seeds can be stored for some time and still remain viable. Once the seeds are dry they should look something like the photograph to the right.

Pomegranates require a well-draining soil, but they aren't too picky. For my potting mix I used Miracle Gro's citrus soil and mixed it with a little bit of their moisture plus (which I'm trying to get rid of to be honest) and Osmocote time-release fertilizer for flowers and vegetables.  I mixed the two together in a bowl with some water until all the soil was damp. The Jiffy peat pellets would also be a great option for these seeds. If you need a refresher on what any the materials I use are and where to get them you can visit the tool shed portion of my page.

You are now ready to fill the pot or put your seeds in your peat pellets. Place a few stones or pot shards in the bottom of the pot to aide with the drainage and root aeration. Fill the pot with your soil mixture. Don't pack it down. Pomegranate seeds like their soil to be loose. Use your finger to make slight depressions in the soil and place one seed in each. Cover each 
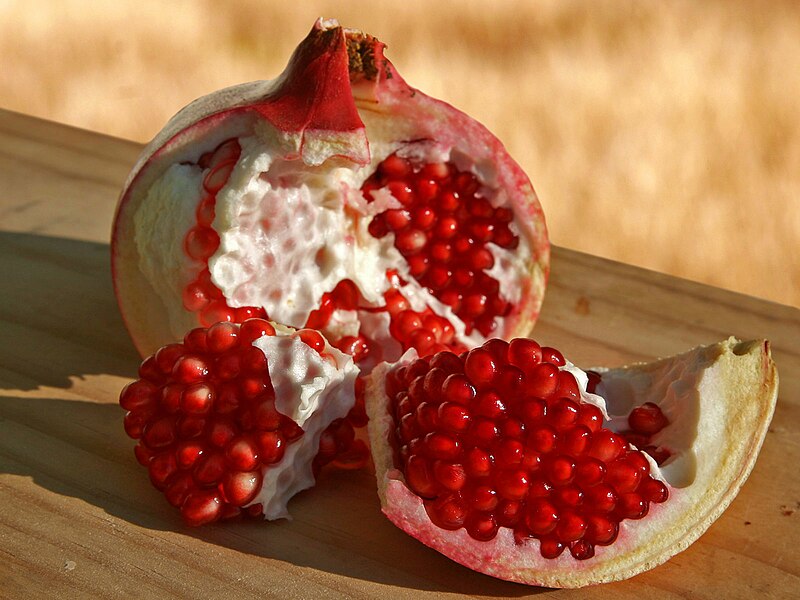
seed with a light dusting of soil and a spritz of water to seal the deal. Cover the pot with a poly bag or cling wrap to seal in the moisture as the seeds will benefit from humidity. Now place your pot on a heating pad or in a warm area and wait for germination, which should take 1-2 weeks. Keep them warm and damp and you'll get your very own pomegranate shrub. No more need to pay that $4/fruit fee at the store. You'll have your own backyard supplier!


Additional photos of sprouting plants:


Know Your Pomegranate!

Source: Our Healthy Living
Hellooo sweet sensation with health benefits! Introducing the pomegranate, the miracle fruit that has taken society by storm. It's amazing how expensive they are now. I bought four yesterday for a whopping $12! With that I thought I'd do a little research. To my surprise, they're quite simple to grow and the seeds inside store-bought fruit are viable! With that I made a little research project of them.

The pomegranate (Punica granatum) is a species of shrub to small tree native to the Middle East. It has been present throughout history and is even mentioned in the Bible. Its fruit has been valuable medically for it's high levels vitamin C
Photo by pizzodisevo
and antioxidants (along with several other beneficial vitamins and minerals). The shrub itself is quite hardy and can be grown up to 30 feet or can be pruned as a shrub. Pomegranate shrubs have even been grown as bonsai plants. Their glossy leaves are dark evergreen to deciduous depending on climate changes and have an opposite simple pattern. The flowers of pomegranates range from scarlet to white, depending on the variety. They are attractive to hummingbirds so pomegranate shrubs make lovely additions for gardeners who hope to attract such company.

The pomegranate can be grown outdoors in USDA hardiness zones 7-10 and requires direct sunlight to partial shade.

Meet the Plants

These are the two I have that are growing and big right now. I have the urge to name them now that I have to write about them so we'll call the big one Osmer and the little one there Pico.

Osmer is a bird of paradise and he's about a year old. In maybe seven more he'll finally flower. I bought him at an exotic plant shop where the owner gave me a batch of seeds that I recently planted. It'll be a while before they germinate as birds of paradise and their relatives, the banana, take a long time (sometimes as long as 9 months he told me) to sprout.

Pico is my cacao plant and he's just a few weeks old. He lives under a big pretzel jar so he gets humidity. We've had some trouble together. He's from my first round with cacao and let me tell you it was very experimental. The ones that were left after bouts with disease and rough conditions died when I had to go home for a weekend. Except Pico. He's had a rough time but it seems that he's still going strong. He has to be propped up because that big leaf is too heavy for his stem as of yet. I'm not sure how this is going to work out but I'm still hoping for the best.

I have lots of house plants but they aren't the subject of this blog as of yet. Most of them are just your average houseplant that doesn't require much special attention. So here's what I've got so far and I'll be blogging about my new additions.

Additional Images:


~~

How to Grow Theobroma Cacao

Source: Scharffen Berger
Yay! We're at the part where I give you tips and junk to help you grow the holy fruit. Your first challenge: getting your hands on viable seeds or a pod. That's a tricky one since cacao seeds are recalcitrant (ahh the first botany term--at least on my site). This means they gotta be fresh (more info on cacao seed viability available here). Seeds can be bought online at Montoso Gardens or from Carribean Cuts. Occasionally pods are also available on eBay. There are other sellers that offer just seeds or entire plants. Thus far I've only bought pods so I can offer no advice about any other forms of plant delivery nor do I know about the delivery services of the two afore mentioned stores as I have bought mine on eBay to date. Word of mouth seems to be in favor of them as far as I've read.
 
Cleaned cacao beans
After you get ahold of some seeds, the next few steps aren't too difficult. First, if you have a pod, you'll need to open it, extract the seeds, and clean them. For a good visual on how to do that click the following link and watch the video: Grow Chocolate Indoors. He's a little goofy but he does a good job of showing you how to open, extract & clean. When I cutting the pod I use a serrated knife since they can be a little tough and you'll likely need to saw a bit. You can cut the pod around it's circumfrence either lengthwise or width wise. Either way will work. I cut mine lengthwise because it allows better access to the seeds. Either way you cut it be careful not to cut into the flesh/seeds. Typically I find that cutting it almost all the way through then breaking it open with your hands works well in terms of keeping the seeds safe. For seed cleaning the basic technique I like to use myself is filling a bowl with lukewarm water and gently rubbing off the flesh with a fingernail or sometimes even just a stroke of the finger itself. Don't be too rough as you don't want to damage the seed coat.

Now that you've got all that off it's time to plant. Cacao should be planted in a well-draining soil such as the cactus soil I mentioned in the tool shed. For added drainage I put orchid bark (or mulch) in the mix or at the bottom with rocks/shards. Make sure to wet the soil thoroughly, although it shouldn't be a puddle. Make a shallow hole, just large enough for the seed, place the seed in it and cover it up. Cover pots either with sran, plastic bags (not airtight) or a container. Clear plastic storage bins can be of service. You can lay them over the heated mat to help sprout your seeds.

Source: Lokelani Ranch
That's it. All you need to do for 8-10 days is water every so often and watch them. Plain water will be fine. Soon the seed will emerge and you'll notice the cotyledons, which are wrinkly-looking reddish/brown or green things. After a couple days you'll see the beginnings of the "true" leaves, which will be green. You can now start spritzing them with fertilizer occasionally if you like, although since cacao is used to nutrient poor soils and many soils have fertilizer in them you won't necessarily need to. Just remember they need consistent (not constant!) moisture and must never EVER be dry. Don't over water or over fertilize, just keep them moist.

Eventually you may be able to move them out of the greenhouse environment and into your living area. Just remember to spritz the leaves to mimic humidity. Cacao can adjust well to a living-room environment but you have to take good care of it and watch for pests. You'll still have to keep a watchful eye on your cacao plant but take care of it and you may very well be rewarded with some pods in 2-3 years!

For a WONDERFUL pamphlet on cacao care check out this download composed by Mark Guiltinan of Penn State University:
Cacao Care Download

See more about Dr. Guiltinan's amazing lab and projects here.

Friday, May 20, 2011

Introduction to Theobroma Cacao

cacao tree and pods
Source: Viable Herbal Solutions
So fess up. Who here likes chocolate? Better yet, who doesn't?! I know I do and that's why I think it's so fascinating to know a little about the plant that fuels a $98.3 billion industry. Politics aside, that's pretty darn amazing.

Theobroma cacao is the source of all this fuss. It's name literally means fruit of the gods, and fruit of the gods it is. This relatively short (15-26 feet) tree can produce up to 20 cocoa pods.  Each pod will contain anywhere from 30-60 beans inside. It takes about 10 pods to produce 2.2 pounds of chocolate paste. Just to give you a little taste of how low that yeild is consider that the world consumed about 3.5 million tons ( of cacao product from 2003-2004. That's seven billion (7 000 000 000) pounds if I did all that math correctly! That's a lot of zeros, folks.

Alright, I'll get off my soap box of cacao amazingness and get to the botanical facts here. Cacao can NOT be grown outdoors in areas where temperatures drop below 55 degrees for a prolonged period of time. Generally they'll grow best in hot and humid environments that receive regular precipitation (or a greenhouse!). That typically confines them to USDA climate zones of 11+. As you can see below the U.S. unfortunately does not make the cut.


source: arborday.org

There are three general varieties of cacao: criollo, forastero and trinitario. Criollo cacaos are regarded as the highest quality of cocoa-producers but are difficult to grow due to their increased susceptibility to disease. Forastero cacaos are the most productive of the three. All cacao is susceptible to disease and it is estimated that 30% of the global yield may be lost yearly to fungal disease. I can tell you from my own experience that this is true. They are very sensitive and because it needs to be hot and humid for them fungus can become a problem. I usually just spray it with some anti-fungal spray before it gets anywhere.

cocoa pod photo ©Robyn Lee on Flickr
Theobroma cacao generally begins to produce fruit after 2-3 years. The fruit ranges from deep red to yellow in color and is referred to as a cocoa pod. Pods may contain up to 60 seeds surrounded by a white, sticky flesh. This flesh is quite sweet and can be enjoyed right out of the pod. The beans, on the other hand, are very bitter. In order to produce the chocolate we all know in love they must be dried and fermented. There is a long process to this.

For more information on cocoa production and propagation please visit the Internation Cocoa Organization's website. I will follow with more posts and updates about the cacao and how to grow it. This is just an introduction.

My additional sources:
Trade Winds Fruit
Montoso Gardens
University of Louisiana
Wikipedia

The Tool Shed

This is a list of the things I like to keep handy for my "gardening." I'll add to it if I find anything new:

Poly (Polyethylene) Bags: these heavy-duty plastics make a great makeshift greenhouse to put over developing plants that require high humidity (like cacao). They're also useful for transport and protection. You can find them online, at hardware stores and I believe Staples carries them as well.


Source: Amar's World
Peat Pellets:  these may just be the best invention ever! They're cheap, easy to use and seeds germinate so well in them. Jiffy even makes little greenhouses that you can buy for a minimal cost with the pellets in them. I have one that I bought for ~$5 and I use it over and over. It's not high quality but it's sufficient.


Source: Lawn And Garden Specialties
Heating Pad: I find a heating pad essential to seed germination and plant growth (especially if it's cold out). The one I have for my windowsill is just a simple back heating pad but I've been planning on investing a seedling heat mat and a heat mat thermostat. I think even a reptile heat mat would do, just be sure not to cook your plants! I usually set my jiffy greenhouse on it and the seeds are nice and warm (and humid!) all through the night. At some point if you find you're germinating a lot of seeds at once you can also invest in a set with a higher quality greenhouse and mat.


A Balanced Fertilizer: what I mean by balanced is that they have fair percentages listed for N-P-K. For instance I use Osmocote's flower & vegetable plant food which has a 14-14-14 content value, meaning 14% of each Nitrogen, Phosphorous and potassium (K). You can use custom fertilizers for different types of plants but mine have been fine so far with just this and approximately a 1:5 dilution of 10-10-10 fertilizer watering every other day or so (in other words I put about 1/5 the regular amount in the water). You don't necessarily need both, but a balanced fertilizer can be a good base for your growing needs.


source: New Stuff
A Plant Mister: can be very useful when dealing with plants like cacao that are sensitive about water and like a little misting on their leaves. Actually, what I have is a Misty Mate Cool Blast mister. It's perfect, easy to use and it doesn't require a battery. I bought mine at Five Below for (obviously) under $5, but they don't have an online store. Seems these guys are tricky to find but you can surely dig up one or something comparable if you really want. Any mister should be fine, however.


source: Novosel Enterprises
Pots: obviously, right? I like the cheap nursery pots to start since inevitably some plants won't be making it to the full-grown stage. I only have a few that I reuse until they're gone because I've given them away or they've ripped. They're pretty sturdy and easy to store. You might even have some saved from those houseplants you bought at the grocery store or Home Depot over the years. I also like to have some net pots which are great when you're growing plants that need a lot of drainage (like most tropicals do).  The ratio of pots you have will depend on what you're growing. In the end, nursery pots are usually sufficient for any plant. Remember to recycle!


Soil: again, I know, it's obvious. I keep citrus soil around for my tropicals because it's well-draining and I can mix it with orchid soil to even further improve it if need be. My cacao plants really like that mix.

Photo by Ryan Aiyappa


Rocks or Pot Shards: for the bottom of the pot. Helps with aeration and water drainage. Hey how about that pot the kids knocked off the table last week? This is a great way to reuse those broken and rejected pots you've been collecting all these years.


There you have it, folks, the basics of what (I think) you'll need to grow most plants including the exotics. You might have a few additional things like gardening tools you might want (as you'll see I use a spoon and my fingers since there's not a lot of extra cash flow on my part).


*Note that any links to stores are just the first examples I stumbled on. You'll probably want to shop around to make sure you're getting a good deal.

About Me & My Blog


Photo courtesy of The Grapevine
I'm Steff and I like to grow things. I live in a small urban space so there's not much room. My garden is mostly out on my fire escape and that's something I have to deal with every time I want a new plant.

In addition to space constraints there's the money factor. I'm currently a student at a state university and believe me when I say money is a definite object. However, my motto with gardening is if there's a will there's a way. I will scrounge and scrap until I find a way to make it or buy it cheap if and where I can.

I am in love with exotic plants (just one more reason I have to save the moolah where I can). By no means am I any sort of an expert but I'm a pretty good researcher. I'd like to share what I learn with anyone else who maybe has a passing interest in growing and/or learning about bananas, theobroma cacao, pomegranates, birds of paradise... etc. and anything else I come into contact with.

On the personal level, I'm a student in college pursuing a healthcare profession (PT). I like to help people and am a generally friendly kind of person. I wish I had time for all my hobbies but unfortunately there's just not enough time.

Please feel free to contact me with any questions, corrections, suggestions, criticisms, stories... pretty much whatever you want (except personal stuff). I'll try to return emails as quickly as possible.

Happy planting!

Steff
cutienut@live.com

Header design credits:
Flower brushes by Stardixa and  Shizuru117
Original vector image from Vector Portal
City Outline by Montini Catholic HS